Tuesday, July 29, 2014

Massaged Citrus Kale Salad

I have always loved kale as you all know...but it wasn't until a few months ago that I discovered the awesomeness that is massaged kale. "What are you doing, turning your kitchen into a spa?" Well...in a way yes since you are massaging kale with olive oil, which does make your hands silky soft. But still, why massage? Well, the same texture you get from sautéed kale can be achieved by massaging raw kale as well. By working a mixture of oil and vinegar/citrus juice into the kale, you actually break down the fibers that makes the leaves tough. The result is a delicate, yet still crunchy salad. The best part is, you can massage the salad the night before, and it just gets better the more you let it sit in the fridge!


Sorry, there was no way for me to get actual pictures of myself massaging the kale since I like my phone "oil-free". However, the best way to massage is to...
  1. Grab a big bowl.
  2. Mix up a vinaigrette of 1 teaspoon olive oil, 2 teaspoons vinegar/lime/lemon juice (I like Trader Joe's Orange Muscat Champagne Vinegar), 1/4 teaspoon (or a squirt) mustard, salt/pepper to taste. You can add dry or fresh herbs here if you like as well.
  3. Add 4 handfuls of kale (trimmed and chopped)
  4. Get in there with both hands for 2 minutes. 
Alas, there are no photos of me massaging since I don't have three hands. However, if you'd like to come over and be my extra set of hands, I'll gladly share my food with you after! You know, a little bit of you you massage my back and I'll massage your kale kind of trade...


Hmmm, was that too cheesy?

Anyway, I like to top this citrus salad with sliced strawberries and pecans; although I've been known to add poached chicken, goat cheese or anything else looming in my fridge. Pictured above I served it with an open-faced sandwich of whole grain toast, avocado and an over easy egg.

So, how do you massage YOUR kale?

Sunday, July 20, 2014

Fun Food App: LevelUp


Some friends of mine told me that I always know about the coolest apps. I don't know about that, but when I see an app that rewards me for doing something I already do, I download it immediately and tell the world about it!

LevelUp is my new favorite payment app. Think of the Starbucks payment feature on their app, but instead of pre-loading money onto your account, your credit card is connected to the app and can be used at local restaurants. In DC, I've used it at Sweet Green, Boloco, Protein Bar, District Taco, BGR, and Taylor Gourmet, but they also service several food trucks and other restaurants around the city. LevelUp providers are listed according to what is geographically closest to you, which makes choosing your lunch spot a breeze.

Besides being able to pay for your bill (as well as tip if you like), you will get money off your purchases immediately after downloading the app, as well as once you reach various spending levels at each restaurant. I love that I don't have to carry around several loyalty cards to get free food! I still have $5 off Taylor Gourmet I need to use plus the ones pictured below. Talk about saving money! That's pretty much my entire bill!


Whew, can you tell I'm getting excited about this app just talking about it? Now, back to the serious matters at hand. I know the biggest issue with these types of apps are security. LevelUp doesn't keep your card number on their servers, but keep them directly with the merchants, so it's just as safe as swiping your card at the restaurant itself. Now, that's not to say it couldn't potentially be stolen (I had my credit card number stolen at a pizza place in New York, so it can happen anywhere these days!) but I think this is one of the most convenient and safe payment apps I've seen thus far! Hopefully vendors will see this is a great service to offer customers and will expand to more restaurants throughout the city!

I am not getting any referral perks for mentioning this app on my blog. I simply want to share this amazing app with all of you!

Monday, March 3, 2014

Sipping Chocolate


I'm stuck inside during a snow storm...in March! Plus I have to telework, so no adult snow day for me....What is this world coming to?!  How do I turn a cold day working into a comforting day indoors? Sipping Chocolate!

I first learned the difference between my childhood hot cocoa and sipping chocolate when I went to Angelina Cafe in Paris, France back in 2010. Seriously, if you are ever in Paris, go to this place and wait in the 40 minute line to get a table. Please just trust me on this one.

When I think of typical hot chocolate, I think of the little powder packet from Swiss Miss. The difference between typical hot chocolate and Angelina's "sipping chocolate" is the consistency and amount of sugar. Angelina's is like drinking a chocolate bar. But not just any sugary, overly-sweet Hershey bar. I'm talking rich dark chocolate. Belgian dark chocolate. Ok, well, it was probably French dark chocolate, but go with me here! Sipping chocolate has a thicker consistency than it's Swiss Miss counterpart, so think thicker than a latte, but thinner than chocolate sauce that you would put on an ice cream sundae. When you take your first sip, it's like drinking directly from Willy Wonka's decadent chocolate waterfall that's flowing from an airy chocolate cloud...

Ahem. Now that my obsession is evident, it's time to dig into making some sipping chocolate at home. The key to a good sipping chocolate is high quality chocolate, milk, and vanilla extract. That is it. No sugar. No powder. The point isn't to have a sweet drink but a rich, velvety chocolate experience.

To make a single serving...
  • First pour a mug 3/4 full of the milk of your choice (I use vanilla almond milk).
  • Next add 1/8 of a capful of vanilla extract (aka, more than a few drops, but less than a teaspoon). 
  • Finally add chocolate. I used 1.5 handfuls of Trader Joe's semi-sweet chocolate chips. The amount of chocolate you add is completely up to you! I like mine pretty rich, so for your first try, start with 1 handful of chocolate, then add more as your tastebuds prefer.
  • Stir the ingredients together over medium heat with a whisk until the chocolate has dissolved into the milk and it's heated to your preferred temperature (around 5-8 minutes). Please do not heat this on high heat because you will scorch the milk and potentially burn the chocolate.


That's it! Of course I'm a purist so I drink this as is, but if you want to mix things up add whipped cream, cinnamon, chili powder for some kick, or whatever else your tastebuds may demand! 


Tuesday, July 23, 2013

Tip: How to Fill a Ziplock Bag


Has this ever happened to you? You want to freeze a soup or sauce in individual Ziplock (R) bags but you you end up spilling more on the counter than you put in the bag? Here's my completely logical, but rarely thought of trick...Put the bag in a container to hold it first!


As with most of my tips, I thought this was a fairly well known tip, but any time I pull out this trick at a friend's dinner party, I always get one or two "why didn't I think of that" comments!


There's really no method to this tip. Simply open a plastic bag into a cup, fold the opening over the mouth of the cup, then fill with any soup, sauce, icing or in the case of my pictures, salad dressing. It's like having a third pair of hands!


My only word of caution is to make sure that the liquid you're using is NOT boiling. This will cause the bag to melt, which would lead to an even bigger mess! So if you are storing a soup, make sure it sits at room temperature for at least 10 minutes. 

Enjoy your cleaner counter and freer hands!

Tuesday, June 25, 2013

Orecchiette & Zucchini in Meat Sauce


Tonight I was craving beef for dinner, which is crazy because I hardly ever eat red meat these days. So I walked into Trader Joe's to grab the ingredients for a meat sauce when I saw the most beautiful yellow local zucchini. I knew then and there that I must have it! But how to eat it?...


Why with pasta of course! I love adding zucchini into my pasta dishes. They help bulk up the nutrition, plus, since they have such a light flavor, they don't really alter the flavor of the sauce. Win win! Although, I actually like to eat zucchini raw, so I may be a bit biased....

What do I love about this dish?
1.) I made it with local fresh ingredients.
2.) I spent less than $4 (see my calculations below).
3.) It took me less than 30 minutes to make.
4.) I got to use my fun-shaped orecchiette pasta (aren't they the cutest?!)

Orecchiette & Zucchini in Meat Sauce
Servings: 2 larger dinner servings, 3 medium lunch servings

Ingredients
  • 1 clove garlic, chopped
  • 1 T olive oil
  • 1/2 lb ground beef
  • 1 1/4 cup (or a heaping cup) dry orecchiette pasta
  • 1 medium zucchini, cut into quarter moons
  • 1/2 jar marinara sauce
Directions
  • Bring a large pot of water to a boil. Add salt & pasta, then cook according to the directions. I like my pasta very al dente so I cooked mine for 9 minutes instead of the recommended 12. Drain and set aside.
    • TIP: orecchiette pasta likes to stick together due to the shape of the pasta. To try to avoid that, stir continuously for 30 seconds after adding the pasta to the water. 
  • While the water is coming to a boil, chop the garlic and toss it into a large skillet with the olive oil. Heat on medium high heat until fragrant then add the meat. Separate the beef with the back of a wooden spoon and cook until there is no red color to the meat.
  • Add zucchini and continue cooking for 2-3 minutes or until softened. If you like your veggies more well done, cook an additional 2-3 minutes. Season with salt and pepper to taste.
  • Stir in the marinara sauce and the drained pasta, then cook until heated. Check the seasoning and you're good to go! I sprinkled a little parmesan cheese on top of mine to finish it off.


Cost of my Dinner
When I do my calculations I don't include pantry items. This includes things like seasonings (salt, pepper, herbs, etc), garlic, oil (olive, coconut, sesame), soy sauce, dry pasta, rice, flour, etc. This is because all of these items are minimal cost in the total of the recipe, especially cooking for one.

$1.845, ground beef - $3.69 per pound; I used half a pound and put the rest in the freezer
$0.645, marinara sauce - $1.29 per jar; I used half in the recipe and put the rest in my fridge for later
$0.79, zucchini
$0.25, orecchiette pasta - $0.99 per bag; I used approximately 1/4 of a bag

Total cost of tonight's pasta dish - $3.58
Price per serving (3) - $1.18

That's cheaper than fast food! Isn't being a Graduate Gourmet fun??

This recipe may seem too simple to be gourmet, but some of the best dishes simply enhance the ingredients so that they can shine. I really wanted beef tonight, and this recipe let the meat take the lead. Plus I get to enjoy it for two more meals...how yummy will this be tomorrow?!

Wednesday, June 19, 2013

Tip: Juicing Citrus


Hate it when you squeeze lemons or oranges into a sauce and get the seeds in the pan? Well, just squeeze the fruit with the cut side up. This allows the juices to run over the sides of the fruit, while keeping the seeds within the peel.


You may think this is a silly tip, but I suggested this to my friend once and she exclaimed "why hadn't I thought of this?" Plus, why dirty another bowl by squeezing the fruit there first, then picking out the seeds. This way you save hassle and dirty dishes!


Monday, June 10, 2013

I'm back!

I've been without a personal computer for almost a year. Can you believe that I survived that long?!  Although, to put things into context, I've had my iPad/iPhone at home and can do anything I need a keyboard for while I'm at work. It hasn't been terrible, but I am SO glad to be back online!

Why have I been without a laptop? Well, I woke up one morning to find my latptop on the floor...which isn't odd except that I hadn't put it on the floor but on my side table the night before. When I opened the laptop I saw that my screen was broken. I went to Apple to see if I still had AppleCare (because all that info was on my laptop of course), and of course it had expired. The cost of a new laptop screen?? $350-400. Oy. So instead of putting money into a laptop that I was hoping to last another 6 months before buying a new one, I just decided to go laptop-less until I saved enough for a new one.

My saving strategy started off with a monthly saving plan. I wanted a laptop that would be at least $1000 plus taxes & AppleCare, so I budgeted $1200. If I saved $200 a month, I could have a laptop in 6 months, easy! I already was saving about $100 a month, so I knew I could save another $100 by reducing my "dining out" budget.

Well, as happens most times in life, I wasn't able to execute my plan as I had hoped. I was without a roommate for 2 months and had to pay both halves of the rent/utilities until I found one! I also had to dip into savings to pay for one of the months rent, so the 6 month plan stretched to a year or more plan.

Thanks to a little creative saving (and buying a refurbished laptop instead of a new one) I finally have my new laptop! Be on the lookout for more posts on saving money as well as recipes!

Thursday, December 27, 2012

Green Juice


Whew, it has been a crazy year...can you tell by the way I haven't posted since July?! So sad!

Whenever I'm crazy stressed, I tend to eat the worst food possible. Example: as I type this I am eating pad thai. So, to kick my butt back in order, I am going to start juicing again.  I promised I would post my green juice recipe forever ago...so here it is! I adapted this recipe from the Crazy, Sexy Cancer "Make Juice, Not War" green juice. You can see Kris Carr make her juice on YouTube here.


Here are my only guiding criteria when juicing:

  1. Keep the veggies/fruit all the same color. This way your juice is a beautiful bright color and not brown. Ugh, who wants to drink brown juice??
  2. Use what is in season. Juicing can be expensive, especially when juicing things with little pay off like leafy greens. You see a sale on swiss chard? Use that instead of kale! On my budget I can't break the bank for the greens I'm "supposed" to use, so I use whatever is on sale to keep my budget in check.
  3. Change up your "sweetener". Bored with green apple? Try a pear instead!
  4. Always use a cucumber. I don't care if you don't like cucumber normally. The cucumber bulks up your juice and is great for hydrating. Without it, you just have one glass of really strong, expensive juice...
My recipe makes enough for two/three servings (dependent on how much juice you get out of your veggies). I usually make the juice the night before and store in small mason jars filled all the way to the top. This way you limit the oxidation/browning effect on your juice. It can store up to two days, but it's best to drink as soon as possible. 

Ingredients:
1 inch piece of ginger, unpeeled
1/2 head of romaine (approx 10 leaves)
3 handfuls of baby spinach or 4-5 kale stalks
2 stalks of celery
1 broccoli stem
2 medium granny smith apples
1 medium cucumber (peeled if not organic)

Directions:
Juice all ingredients in your juicer and enjoy! My only suggestion is to juice the ginger first, then alternate hard/soft items, and end with the cucumber to push any remnants through the juicer.

Can you tell how bright green this is?? I like drinking juice in a wine glass like Kris Carr...makes me feel special feeling like I'm drinking something healthy.

Wednesday, July 11, 2012

Nectarine & Goat Cheese Salad


Fruit on a salad? Yes, I went there....well, more specifically, SweetGreen went there last month with their June salad of spinach, peaches, goat cheese, almonds, and basil. This salad cost me $7.95+tax in the store, which for DC, is not a bad price.

In my CSA box last week I had nectarines, which are not my favorite fruit to eat. I could tell this week that the fruit was almost ready to throw out (and I hate throwing away food!) so I racked my brain for what I could make. That's when I remembered the awesome salad from SweetGreen and voila! Dinner!

Ingredients (my version):
1 nectarine
5 leafs of romaine lettuce, chopped
handful of sliced almonds
1-2 T goat cheese, crumbled
1 T basil, chopped (optional)

Directions:
Drizzle with your fav dressing (I like a little balsamic vinegar, olive oil, dijon mustard, salt & pepper) and your done!

So how much does my salad cost? Well, if you take into consideration that I buy a heads of romaine for my green juice,  left over goat cheese from my sandwich, nectarine from my CSA box, and almonds that I just keep in my fridge...then free, right?! Really it is approximately $2 total. 

This salad is perfect for lunch, but it was not really filling enough for dinner. Next time I'm going to toss on some roasted chicken or sauteed shrimp.


Monday, July 9, 2012

Copycat Recipe: Potbelly's Mediterranean Sandwich


I am literally OBSESSED with Potbelly's Mediterranean Veggie sandwich - spicy hummus with cool, crisp veggies and creamy feta cheese. My mouth is watering just thinking about it...I especially love the price ($4.50+tax), but I'm really trying to rein in my spending after reading the blog "No More Harvard Debt" (a GREAT read and inspiration to pay off my student loans) so I will be brown bagging it every day from now until my loans are paid off...ok, you caught me, I still budgeted for foodie outings, but hey, I am eating out far less!

Lunches can get boring when you don't go out to buy them...it has to be something psychological because the restaurant salad/sandwich tastes better than the one I brought from home, even if they have the same components. *sigh* That's why I generally bring pasta/quinoa salads to work. They tend to keep me from going out to get something "better". However, I think this sandwich may be my turning point since I really liked how it turned out!

Ingredients:
1 pita pocket
2 T hummus (roasted red pepper or garlic suggested, or the three layer hummus from TJ's!)
1 T Goat Cheese
1 handful packaged lettuce (or 2 romaine leaves chopped)
2 artichoke hearts (canned is the cheapest, then save the rest in Tupperware)
1 roasted red pepper, chopped
1/8 small cucumber, peeled & chopped

Directions:
Fill pita with all of the ingredients and enjoy!

Now, I used pita because that's what I had on hand, but feel free to use any type of bread you like. If you're taking this sandwich to work, I would suggest ringing the water out of the peppers/artichokes with a clean towel before creating the sandwich. Otherwise you will have a soggy mess when you open it up at work a few hours later.

Another suggestion would be to simply keep the jarred ingredients at work, then stack up the sandwich there. This keeps your bread dry and saves you prep time in the morning.

Add the following for variation:
- Deli meat or left over chicken breast
- Chopped olives
- Chopped tomato
- Use olive/pepper tapenade instead of hummus
- Feta instead of goat cheese

Approximate cost of my sandwich - $3. This is taking into consideration the number of sandwiches I can make per can of artichoke hearts (4), and doesn't include the fact that the goat cheese and red peppers will last me far more than just 4 sandwiches and I can use the lettuce/cucumber for other salads. So really, it probably costs me more like $2.

Sunday, May 20, 2012

Juicing for Beginners: Green Lemonade


A couple of months ago I watched the documentary "Fat, Sick, and Nearly Dead", which changed my whole outlook on what I eat. The guy in the film drank only juice for 60 days and completely cured himself of of his auto-immune disease! Now, I'm not advocating that everyone drink only juice and water for the next 2 months; I simply want to be a bit more conscious daily with what I eat. The best way I've found to do that is to drink green juice every morning for breakfast. 

Now, this juice is actually not my usual morning green juice (I will post that later), but my first "beginner" green juice. This juice is extremely refreshing and a great way to get yourself psyched up to try the more "green tasting" juices. First, you'll need to buy a juicer. I bought mine (a Breville) off of Craigslist for under $50, which is a great way to try out juicing. 

Next, the produce:
  • 1/2 head of romaine lettuce (approximately 10 leaves)
  • 1/2 large cucumber (or one small/medium one)
  • 1/2 lemon, with most of the peel cut off and the pith (white part) remaining
  • 2 medium apples
This is what I use, but the thing about juicing is that it's all about taste! If you like a bigger lemon taste, juice the whole lemon; if you want it sweeter, add another apple; cucumber bulks the juice up and refreshes the body. I use granny smith apples since they are also green, which makes the juice a bright green color and not brown, which happens when you add in red apples.

To make the juice simply use your juicer to juice all of these ingredients, and enjoy! I actually like to add a little filtered water and ice to this juice so that it is more refreshing and not a strong lemonade.  Still, like I said before, it is completely up to your taste-buds so experiment!


Monday, March 5, 2012

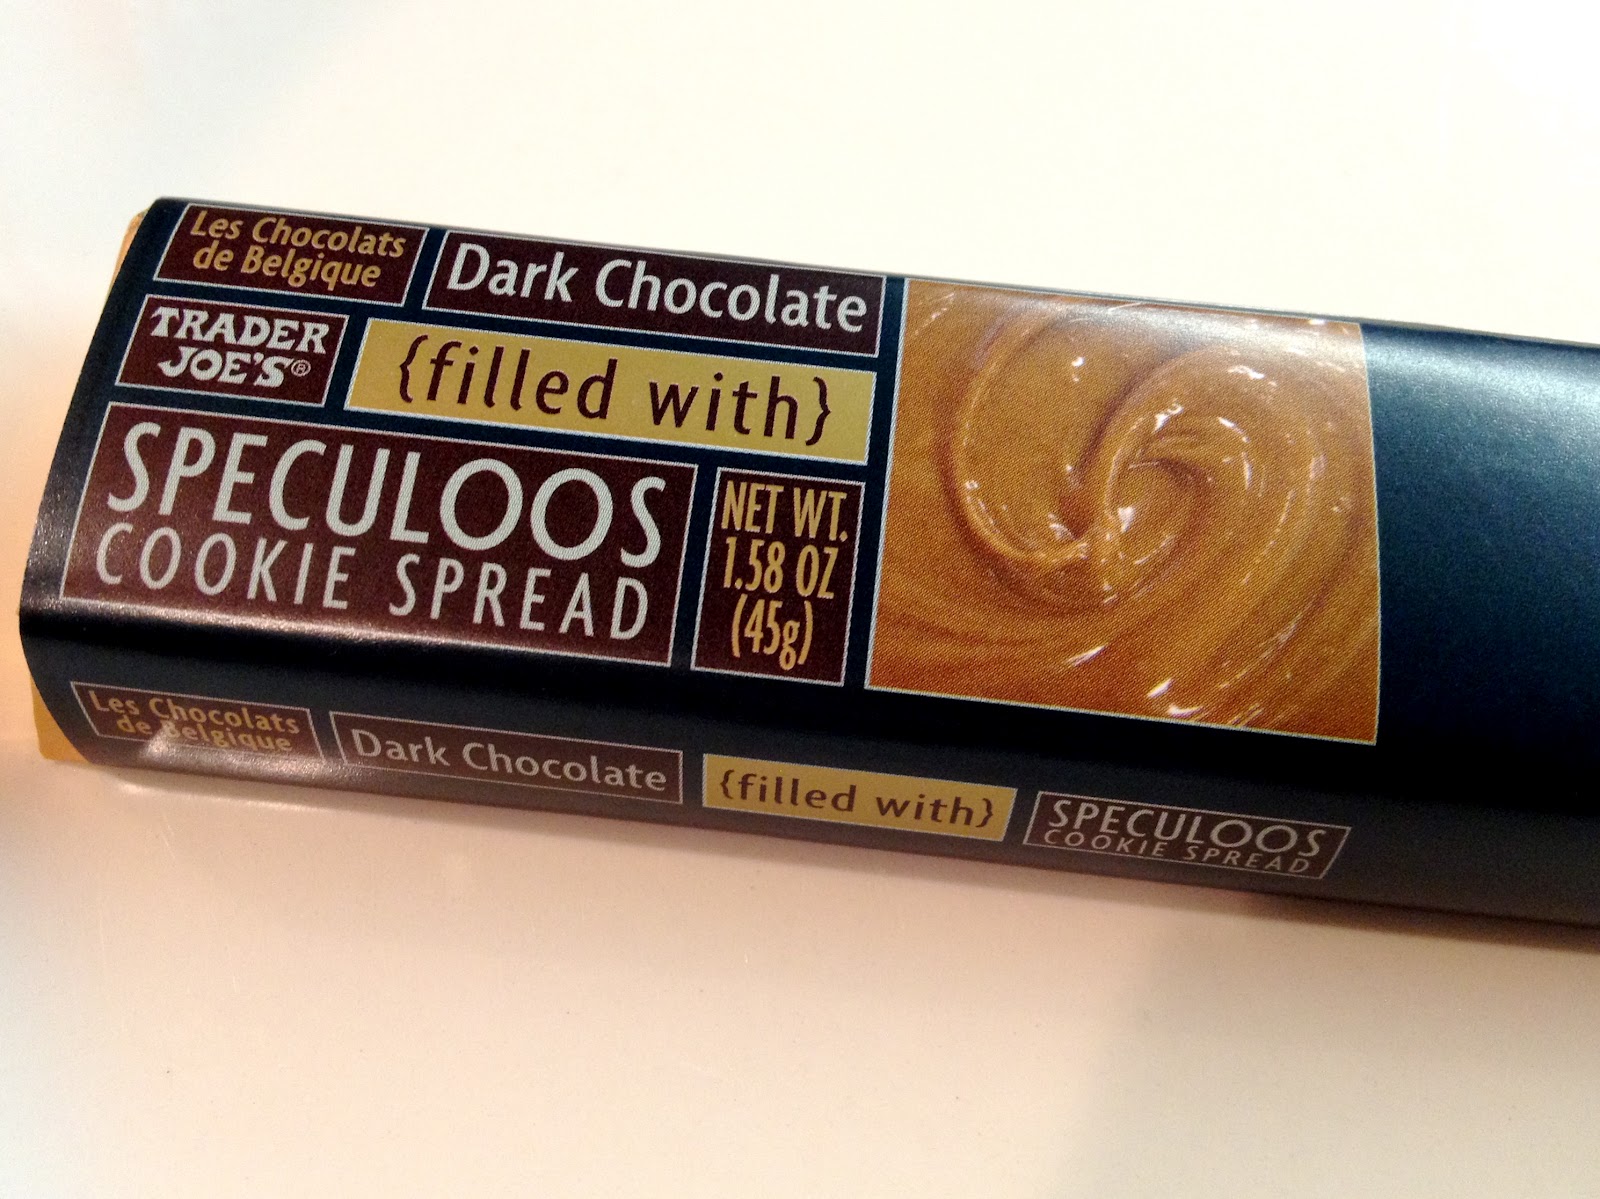
TJ's Chocolate filled with Cookie Spread


This...is my new(est) Trader Joe's obsession...


You know how much I LOVE Trader Joe's Products, but this is just crazy good. They take their new cookie spread (which is like Nutella, but with cookies instead of chocolate/hazelnut) and put it inside of creamy dark chocolate. This combination together makes for a very happy tummy! Plus this is the perfect thing to fix those Monday blues.


Happy Monday Everyone!

Tuesday, February 7, 2012

Chocolate-Banana-Almond Smoothie


When I was home taking care of my mom in November, there were only a few things she would eat. However, she usually wouldn't turn away smoothies or anything with chocolate. So to bulk up her nutrition intake, I put the two together and "created" this smoothie! 

At first I thought I was soooo original, but I have since seen similar smoothies on other websites. Alas, I am not as original as I first thought, but I love how easy it is to be creative with smoothies.

What you need:
1 frozen banana (peeled & chopped into large pieces before frozen)
3/4 to 1 cup almond or regular milk 
1 heaping T Nutella(c) or chocolate almond spread (I got mine at Trader Joe's)
1/4 t vanilla extract (optional)
1/2 mug of chopped ice
chocolate chips & walnuts for topping (optional)

Put all of the ingredients but the ice & toppings into the blender. The reason I put the a range for the milk amount is because you never know how thick "1 banana" will make the smoothie. So I feel it out more so than measure. Once everything is blended, add chopped ice to your liking to thicken the smoothie up a bit. This also makes it taste more like a milkshake than a smoothie.

Top it with your favorite toppings and your done! Mmmm, is this breakfast or dessert? I say both!


Want to make it even healthier? Use 1 tablespoon cocoa powder and 1 heaping tablespoon almond butter instead. Adjust the sweetness to taste with a touch of honey.

Friday, January 20, 2012

Restaurant Week, Meal 1: Taberna del Alabardero

So you know how much I LOVE restaurant week. It's a chance for me to completely destroy my budget for the month with just a few meals...and to have some great food. Sadly, my first meal was not near as tasty as it looked, nor was it worth the restaurant week price. 


My dining companion was gracious enough to let me try her food as well...so you get two tastings in this review! The picture on the top was their salad with a fried-hard-boiled egg, and on the bottom was the mussels & shrimp. The salad was probably the best thing we ate all night. It was lightly dressed and the fried egg was an interesting component. Would I go back just for the salad? No. But was it an interesting dish? Definitely.

The broth in the mussels was amazing (I couldn't stop dipping my bread in it). However, out of my three mussels, one had grit that was audible as I chewed, one tasted old (like it should have been thrown out) and the third was just ok. The rest of the dish (aside from the sauce) was simply underwhelming.


For the second course, I had the sea bream (top) and my friend the chicken (bottom). The sea bream had a strong fishy taste, which I know a lot of people gawk at when I say that, but fish should not taste super "fishy". A "fishy" fish is an old fish.

The chicken was chopped into bit size pieces before it was sauteed, which led to a very dry bite of chicken. The whole time I ate it I longed for a little sauce to help moisten my mouth ("why did they take my mussel sauce away?!"), but sadly there was none. I think the chicken would have been ok if it had not been chopped before cooking, but still, the dish needed more flavor to be considered for a restaurant week menu.


Finally, desert was rice putting and a bread pudding. Both looked lovely, and were not terrible, but at the same time they were not anything to write home about. I think we both only ate about half of our desserts.

So meal number one was a let down. I probably will not go back to this restaurant as there are TONS of Spanish restaurants in the city. Luckily, however, meal 2 was awesome! 

Stay tuned...

Wednesday, January 11, 2012

In Memory of My Mom

Tea at the Willard, Feb. 2011
I would like to dedicate this post to my mother who died on November 19th, 2011 after a second battle with breast cancer. You may (or may not) have been wondering why I have not posted in quite some time. Well, I was home the entire month of November and have not felt motivated to write during/after that time. However, in honor and memory of her, I thought that it was only appropriate that my first post in the new year be about the woman who inspired my love of food, my mom.


My mom taught me to cook at a very young age. When I was 7 or 8, I remember making chocolate chip cookies and talking to the wall as if I was on a cooking show like the Frugal Gourmet or Julia Child. No matter how much I begged, my mom would never buy me an easy bake oven; she told me that if I wanted to bake or cook, we should use the "big girl" oven. I am so glad she pushed me that direction, because if it wasn't for the use of that "big oven" experience I may have never caught the cooking bug.

My mom is also the one who bought my first stand mixer for me when I was 15 (yes, that's the number one gift I wanted for my birthday that year) and a bread machine when I was 16. We thought about starting a cookie flower bouquet business, but that quickly became too much for my high-school-self to handle. However, every year we baked cookies for my aunts/uncles as Christmas gifts, and it became a ritual that I now share with my younger cousins.

Escargot in Paris 2007; picture taken at mom's request (for proof).
Besides baking, my mom pushed me to try new foods and create new dishes. She is the reason I take pictures of my food at restaurants while traveling. She said that she wanted to experience all the foods I was eating, and could do so by seeing pictures of what I ate at every meal. When I came back from Paris, she did not ask "Did you see the Eiffel Tower?" but "What new food did you try?" and "Where's the proof that you ate snails?"

Just a few of my mom's side of the family around 1989
Mom gave me the food bug; the desire to not only make good food, but to create community around food. It always astounds people when I tell them that we have 40-50 people over for Thanksgiving. If you knew my mom (and her two sisters that cook with her), you would know that the size of our Thanksgivings wasn't just contributed to the amazing the food they prepared...but the bond of family. Mom was the glue that really held our family together.

Sweet tea and Paula Deen's, 2008
After her first battle with cancer ended almost 5 years ago, we went on a road trip to Savannah, GA to do what? You guessed it, eat. We planned out every meal (including of course a stop at Paula Deen's) then found interesting places to visit in between. When I travel for work, my co-workers joke that all I want to know is where we'll be eating! This habit definitely stems from our food-based vacations.

Thanksgiving 2008
All of this is not to say that my mom's only legacy was my love of food. She instilled in me a passion for building community, family ties, friendships, compassion toward others and acceptance among many other lessons. I miss my mother terribly, but I know her memory will live on in the traditions I will keep from baking cookies with my cousins at Christmas, to our big Thanksgiving family meals, and finally the recipes and lessons I will teach my kids some day.

I love you mom. Rest in peace.

Monday, December 12, 2011

2012 Restaurant Week: Winter Edition


You know me....I love eating out during Restaurant Week here in DC. I just received an email from my favorite booking website, Opentable.com, that the winter restaurant week is January 9-15!! Remember to book early since times fill up quickly.

Wednesday, November 9, 2011

Spencer's Coffee House - Bowling Green, KY


Today we take a journey a bit south to my homeland...Kentucky.  I'm currently living at home for a month to help take care of a sick family member.  I spend most of my day making pretty bland food for picky taste buds, but every so often I am able to take a break and get out of the house. The past two times that I left the house I ended up at the same place:  Spencer's Coffee House in Bowling Green, KY.

I love local coffee places. They feel so much more genuine than a Starbucks or Dunkin Donuts. Plus, there's nothing like drinking coffee or tea out of a real, ceramic mug.  The first time I visited this establishment I had their drip coffee of the day. I WISH I had photographed what kind of coffee it was because it was really delicious. The coffee was perfectly brewed and didn't feel like it had sat in a container all day (we drank the coffee at 9:00 at night...and you never know how long it's been there!).  The coffee was rich and not bitter, high in (excuse the snobby term) tannin which filled my whole mouth with balanced flavor notes. Basically, this was a darn good cup of joe!

Hooded Sweatshirt Latte

The second time we went, I had to try their hooded sweatshirt latte. Why? Well, first of all, with a name like "hooded sweatshirt" I was intrigued. Secondly, how can a drink be like a sweatshirt? I took my first sip and understood why. The flavors were similar to a "pumpkin spice" but surprisingly different at the same time. When I took a sip, I felt like I was enveloped in fall; warm, creamy and spicy. It's like I was...wrapping up in a hooded sweatshirt! Seriously, I wish I could take this mug of warmth home with me so that I could experience my favorite season, fall, in a cup every day.


The atmosphere at Spencer's is typical coffee shop, but the place had a nice homey feel to it as well. It could be the exposed brick, 10 foot high ceilings, or the hardwood tables and chairs...and yes, you can tell that this is where the KY hipsters go...but everyone was very friendly (I expect nothing less in the South!) and you can tell they are dedicated to their coffee. If you're ever driving through KY, you should totally take a little detour off the interstate to try this place!